Arduino 7 Car Wipers
- Erika Camilleri
- Feb 14, 2023
- 4 min read
Updated: Apr 16, 2024
Windshield wipers are a small part the car but they have a big impact on the driving experience and overall safety. They remove rain, dirt, and debris quickly and smoothly at the push of a button. We will be using all the new components we have learnt recently to build programmable "car wipers".

Here is our plan 🚗🌧️
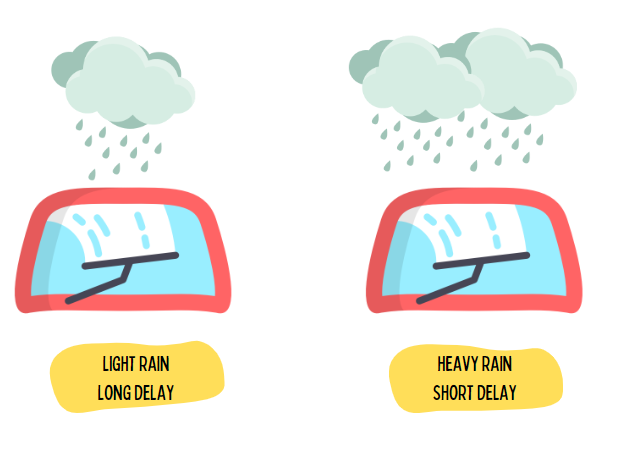
We would like to build windshield wipers that control the speed depending on how heavily the rain is falling. If we have just a drizzle, the wipers do not need to move at full speed, but as the rain increases, the driver will not need to push any buttons to control the speed of the wipers. You might be thinking that our components are too small to really do this... but we just want to test this idea!
In fact, for our proof of concept we can use components we have used already:
a servo to simulate the windshield wipers; and
a potentiometer to simulate the amount of rain that is falling on the windshield.
The value of the potentiometer is going to represent the amount of rain falling on the car.
When the amount of rain increases, we our "wipers" to go faster!
In this lesson... 📝
You have covered just enough material in the previous two lessons to build this cool prototype. Just like we did with the traffic light system, you will once again practice a challenging task based on a real life scenario.
The specifics of what you will build
You will write a program that:

Reads the rainLevel from the potentiometer.
Move the wipers slowly back and forth by writing to the servo.
Map the delay value according to the rain level. This will result in the behaviour that when rain level is high, the delay should be short, otherwise, the delay can be slightly longer.
Use the Serial monitor log to print out the rainLevel.
Build your circuit

Write your program
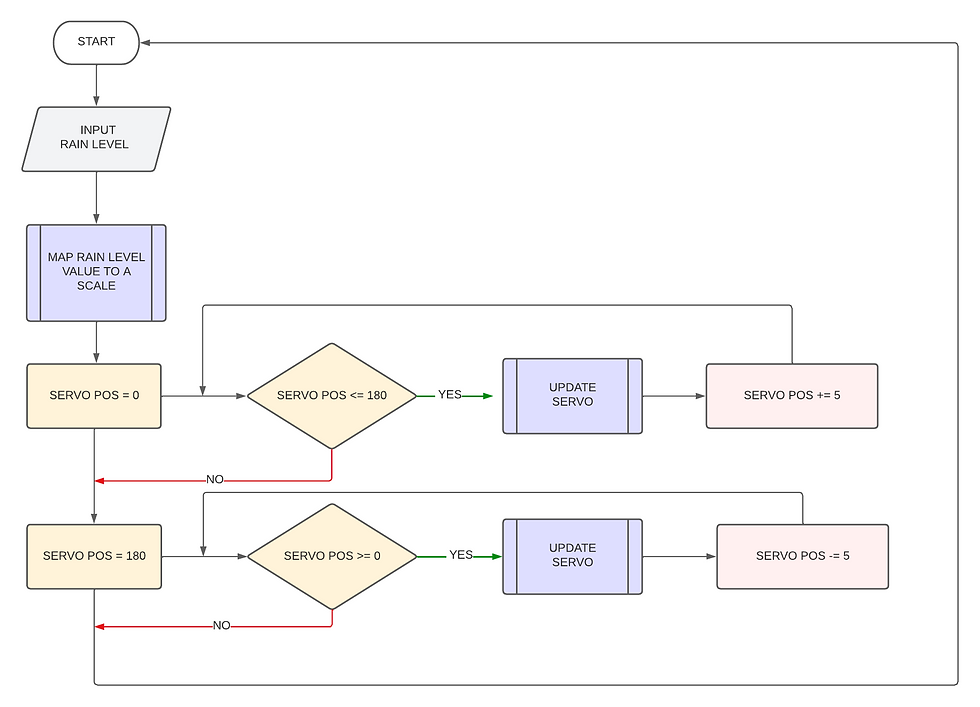
Even though we have been writing programs for a while now it is always best to visualise our problem and plan a way forward. There is not better way to visualise the structure of our program than with a flowchart.

Notice how we did not really need new symbols to draw a for-loop. Try to make the following observations:
The pink shapes correspond to the: starting step, the termination condition, and the increment/decrement.
The blue function is the action that is to be repeated.
The flow line goes back to the termination condition after the increment/decrement until the termination condition is satisfied.
Here is the code:
#include <Servo.h>

Servo myservo;  // create servo object to control a servo

int potPin = A0;  // pin for the potentiometer
int servoPin = 11;  // pin for the servo motor
int servoPos = 0;  // current position of the servo
int rainLevel = 0;  // rain level as read from the potentiometer

void setup()
{
  Serial.begin(9600);

  // attaches the servo on pin 9 to the servo object
  myservo.attach(servoPin);
  pinMode(potPin, INPUT);  // Set the potentiometer pin as an input
}

void loop()
{
  // Read the rain level from the potentiometer
  rainLevel = analogRead(potPin);

  // Map the rain level to a value between 80 and 30
  rainLevel = map(rainLevel, 0, 1023, 80, 30);

  // Log the rainLevel in real-time
  Serial.print("Rain Level:")
  Serial.print(rainLevel)

  // Move the servo in a wiper motion
  // Go from 0 to 180
  for (servoPos = 0; servoPos <= 180; servoPos += 5) {
    myservo.write(servoPos);
    delay(rainLevel);
  }

  // Go from 180 to 0
  for (servoPos = 180; servoPos >= 0; servoPos -= 5) {
    myservo.write(servoPos);
    delay(rainLevel);
  }
}
You must understand the most important parts below. Therefore read carefully...
1. Getting the Rain Level
// Read the rain level from the potentiometer
  rainLevel = analogRead(potPin);

  // Map the rain level to a value between 80 and 30
  rainLevel = map(rainLevel, 0, 1023, 80, 30);
Here we are reading a value from the potentiometer and mapping it to a value that can be used as a delay.
2. Moving the Wiper
 // Move the servo in a wiper motion
  // Go from 0 to 180
  for (servoPos = 0; servoPos <= 180; servoPos += 5) {
    myservo.write(servoPos);
    delay(rainLevel);
  }

  // Go from 180 to 0
  for (servoPos = 180; servoPos >= 0; servoPos -= 5) {
    myservo.write(servoPos);
    delay(rainLevel);
  }
The two for loops do something very simple. They move the servo position from 0 to 180 in increments of 5, and then back to 0 in the same way. So the value of the iterator (servoPos) is being used as input for the myservo.write() function. The delay we saw previously just determines how long to wait till the next movement.
Still hungry for more?
You can try to make the following changes to your program.
Limit the wiper movement to 90 degrees, and make the increments within the for-loop larger, like for example, at 15 degrees per increment.
Practice useing the Serial Monitor, as we did in Arduino 5, you learned in the previous lesson to show the servo position as it changes.


Comments