Arduino 1 Blinking Lights
- Erika Camilleri
- Jul 12, 2022
- 4 min read
Updated: May 29, 2023
Your journey of low level computer electronics starts here. What an exciting time to be learning computer science! Let's learn and have fun.

Glossary
PCB | Printed Circuit Board, is a non-conductive material with conductive lines that are printed to allow electronic components to mount on the board. All components together form a working circuit. |
Peripheral | Auxiliary device used to put information into and get information out of a computer. |
Device Driver | A piece of software that dictates how a hardware device attached to a computer can be used. |
Output Component | Any piece of hardware that converts digital information in a way us humans can understand. |
What is an Arduino board?
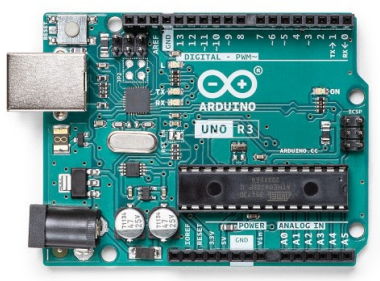
Arduino is a microcontroller development board. To explain, the printed-circuit board (PCB) houses a low power computer system consisting of a CPU, memory, and programmable I/O peripherals e.g., pins and LED lights.
Over the years, Arduino has released over 100 hardware products: boards, shields, carriers, kits and other accessories making it popular amongst engineering students at university and professional engineers that want to get into robotics.

The simplest board to look at is the Arduino UNO R3 board powered by an ATmega328P microcontroller. The board has everything needed to support the microcontroller, including 1KB of EEPROM which we will soon learn is non-volatile memory. A programmer or an engineer can connect the board to a computer using a USB. This board also comes with technical documentation which we will touch on in other lessons. Such boards offer a good opportunity to get into electronics and coding. Moreover, you get experience the fundamental principles of computer science.
Popular boards on the market
Arduino UNO R3 board powered by an ATmega328P microcontroller. 🏆
Teensy 4.0 board which features an ARM Cortex-M7 microcontroller. 🥈
ESP32-S2 SoC powered by a 240MHz single core processor. 🥉
Raspberry Pi 4.0 boasting a powerful Broadcom BCM2711 SoC.
Meet the Maker UNO X

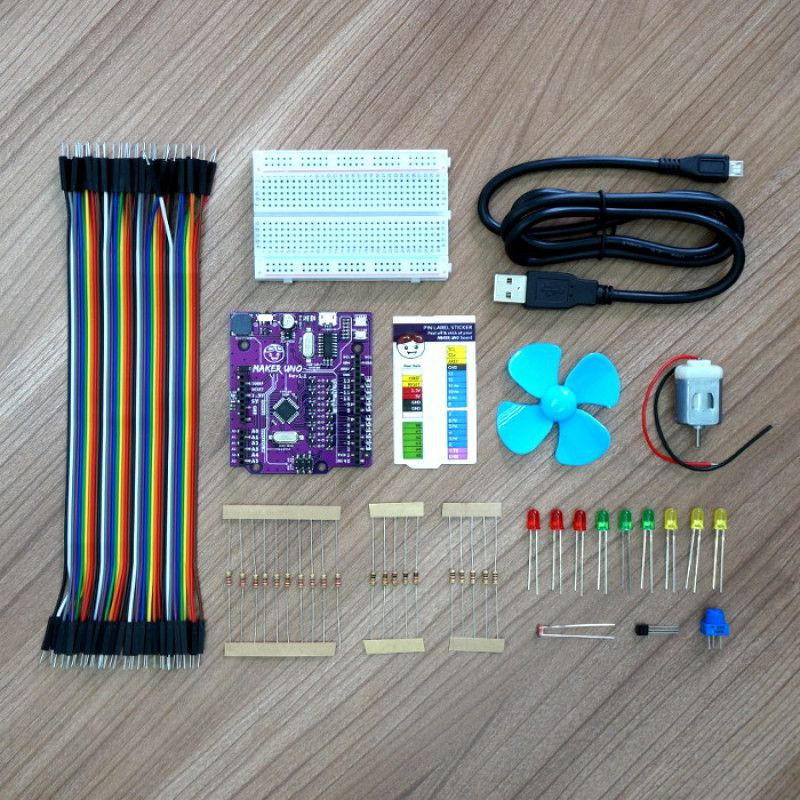
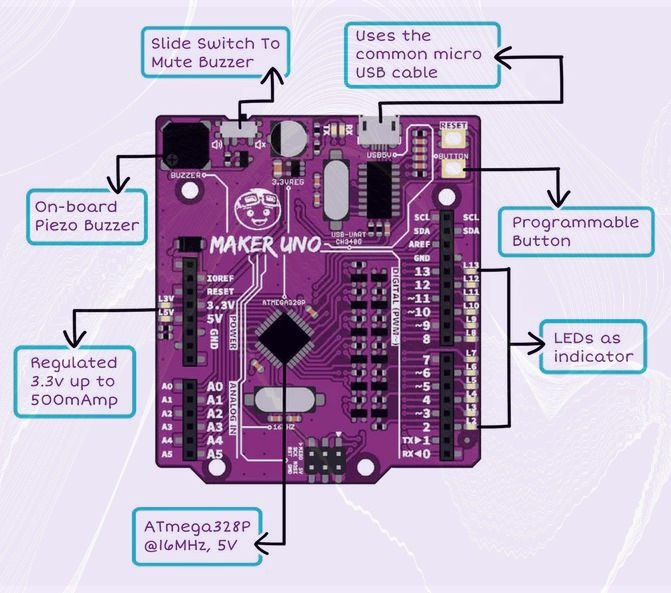
For our practical sessions we will not be using Arduino. We will be using Maker Uno X, an Arduino compatible system that is simplified so that it is easier for you to learn and easier for me to support you when you run into issues 🤞. Similar to Arduino UNO, the Maker Uno X is a single board powered by an ATmega328P microcontroller. The picture on the right shows the contents of the Starting Kit. We will not use all of the components today. In this lesson, we will be mostly getting familiar with the board and doing some set-up activities.

In this lesson... 📝
A walk-through of the Arduino IDE.
Learn how to connect the Maker Uno X to the computer.
In the Arduino IDE, set the Port from Tools > Port.
A simple program for a blinking LED.
Basics: The setup and loop methods
Whenever you work with Arduino code, you'll need 2 blocks, like in the example below:
void setup() {
  // this is where we setup our board
  pinMode(3, OUTPUT);
}

void loop() {
  // this is the main method
  digitalWrite(3, HIGH);
  delay(1000);
  digitalWrite(3, LOW);
  delay(1000);
}
We use the setup() block to initialize our board and let it know which INPUT or OUTPUTs will be used. In this example above, we set pin 3 as an Output. Pin 3 happens to be an LED on the Maker UNO itself.
We use the loop() block to define what we want to happen. In the example above, we switch on pin 3 (HIGH), wait 1000 ms, and switch off pin 3 (LOW). It's called the loop method because the board will keep looping the code within it unless an exit(0) line is added.
This simple example gives an idea of the type of code we will be working with.
Flashing
What if we wanted to extend our above example beyond just switching on and off? Can you add more lines in the loop block to flash 3 times?
Your code should look something like this:
void setup() {
  // this is where we setup our board
  pinMode(3, OUTPUT);
}

void loop() {
  // this is the main method

  // flash
  digitalWrite(3, HIGH);
  delay(75);
  digitalWrite(3, LOW);
  delay(75);

  // flash
  digitalWrite(3, HIGH);
  delay(75);
  digitalWrite(3, LOW);
  delay(75);

  // flash
  digitalWrite(3, HIGH);
  delay(75);
  digitalWrite(3, LOW);
  delay(75);

  // this tells the board to stop looping
  exit(0);
}
Small Tip 💡
You'll notice in the code above that we can use pin 3 as an OUTPUT
pinMode(3, OUTPUT);This depends on the specific board being used. Since we are using the Maker UNO X, which comes with output LEDs on the board itself, we can set pin 3 as an OUTPUT. More on this in future lessons.
Demo: Hello World
It is traditional to write a Hello World program to get acquainted with a new programming language and that is what we will do to ensure we have set up everything correctly. We are going to write a simple program that outputs "hello world". We do have one problem... where are we going to output our message?
We need some form of output component so that we can see the message. An output component is any piece of hardware that converts digital information in a way us humans can understand e.g., text, sound and.... lights! We can use one of the LEDs to output our message in Morse code whereby a dot means the LED needs to light up and a dash means the LED is off for a while. The forward slash /, indicates that we need the pause for a little bit longer to indicate the end of a word.
Hello world in Morse code:
.... . .-.. .-.. --- / .-- --- .-. .-.. -.
Use the code here on your Maker UNO X to see this working, and say hello to your Arduino!
Common Woe: Syntax Errors

All programming languages have rules that are important to follow. As you are learning how to program though, it is very easy to make mistakes and break these rules. Unfortunately, C++ code is very unforgiving and even the smallest mistakes will cause an error. When you break a coding rule, the IDE will let you know and your program will not run!
These kind of typing errors in the code are called syntax errors.
C++ is a programming language that has a lot of rules and the only way to learn them all is through practice and trial and error. However, we can try to list the most common ones beginners like yourself need to be aware of.
C++ is case-sensitive therefore "int" and INT are two completely different things.
C++ statements end with a ";".
C++ uses pairs of "{ }" to group code statements together.
C++ needs to recognize every single word.
Challenge: Retro Christmas Lights! 🎄
Over the next 3 lessons, we will be building an Arduino project similar to your first coursework, including button input, LED output, conditional statements and variables. Each lesson will build on the previous, so it is very important to save your work.
In this first task, we'll be learning how to flash the onboard LEDs ON and OFF.
Small Tip 💡
This task should be easy to do on your own but problems are common and part of learning. When you get stuck, ask the person next to you or myself.

Comments